VuMap allows access to many data layers that can be shown on the map interface. In a case where the user wants to upload their own data sets to the application, VuMap supports a variety of file formats that can be added to the user’s account. This topic describes the steps in doing so.
- Located at the top of the map page within the tool bar is the Upload Data icon.

Upload Data icon location
2. A pop-up window will appear, where users may upload documents by selecting a file from their computer to upload. Note that the file formats currently supported by VuMap are:
- GeoISON
- CSV (X,Y Columns or Well Known Text WKT)
- KML/KMZ
- DGN V7
- Shapefile (must be zipped)

User data upload pop-up
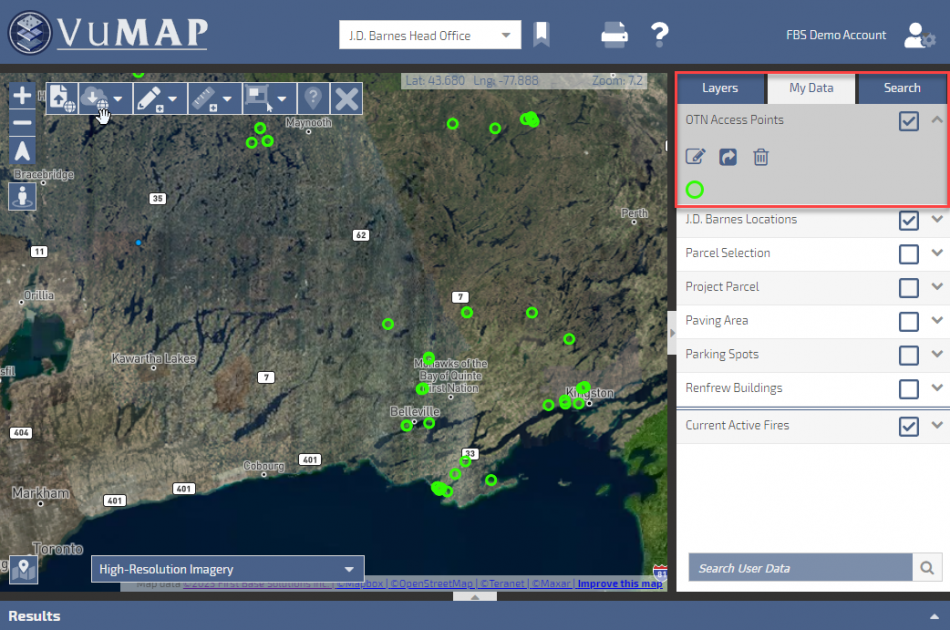
3. The file will then appear in the My Data tab on the widget to the right of the map interface. Here, the uploaded layer can be checked as shown or hidden from the map view. VuMap allows for multiple layers to be selected and layered over each other. On this page, various functions regarding the layer can be accessed; including edit options, sharing, and deleting the layer from the My Data tab.
Uploaded data location within My Data tab
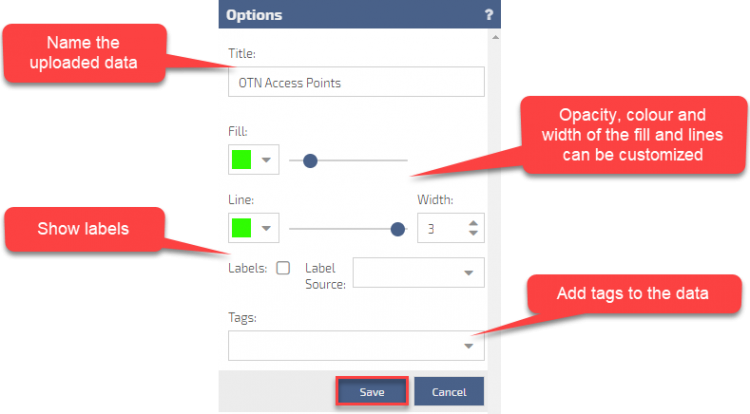
4. VuMap provides the ability to customize the uploaded layers by editing. Various aspects of the layer can be changed; such as the title, colour, opacity, and line width. For organizational purposes, the user is also able to add tags to the data and is given the option to show or hide labels.
Uploaded data options
Deleting an uploaded layer permanently can be done through managing My Dashboard within the user’s VuMap account.